Synchronizing a New Patient Profile from PrescribeIT®
An unsynchronized patient can be easily identified in two ways:
- In bold on the To Do tab of the PrescribeIT® Message Manager
- A red box around the expand icon in the New Rx window
or
To synchronize a new patient record with the PrescribeIT® Registry:
- From the PrescribeIT® To Do tab, highlight the transaction that contains a patient name in bold.
- Select the Process button. The New Prescription window opens.
- Select the expand icon
 next to the Patient field. The Patient Search window opens with the patient information provided from the prescriber through PrescribeIT® auto-populated.
 - Select Search. A local search using the information auto-populated from the received PrescribeIT® transaction is performed. If the patient does not exist locally in PharmaClik Rx, a No Records Found message will display.
Tip: It is important that you exhaust all search capabilities prior to continuing and creating a new Patient Folder, resulting in duplicates in PharmaClik Rx. Clear and refine the search for basic information - Last Name, First Name and DOB.
The PrescribeIT® transaction information sometimes contains additional information, such as Middle name, that your pharmacy may not have recorded. - A local search is performed.
-
If the patient is not found using the patient demographic information from the PrescribeIT® order, edit the search criteria. For example: If the doctor sends an Rx for a patient who's first name is Betty, but locally her name is Bette, search for Bette instead of Betty.
-
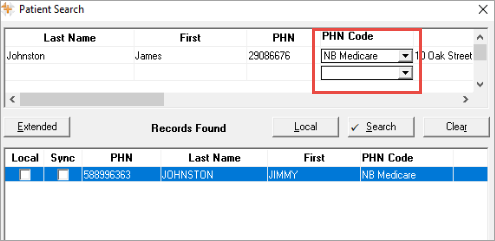
If the patient is not found locally, before adding a new patient record – ensure the PHN Code is selected from the drop down and press Search to perform a NB Client Registry search.
 PHN Code Error
If your pharmacy receives the following PHN Code error when completing a Client Registry Search - the PHN Code is missing from the search criteria.
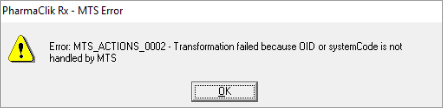
Select the appropriate PHN Code from the drop down list and retry the search.
- Once the patient is found in the Client Registry, the patient can be added locally.
- Select the New button. The PrescribeIT® Patient Compare window will open.
-
Highlight the information in the PrescribeIT® pane (right-hand side), that you would like to add to the PharmaClik Rx patient file.
-
You can select fields individually or use the Select All option to highlight all PrescribeIT® fields.
-
Ensure to scroll down to the bottom of the PrescribeIT® fields to view and copy height and weight details, if available.
-
-
Select the
 icon. The information highlighted will be copied to the PharmaClik Rx pane (left-hand side).
 -
Select OK to save the changes in PharmaClik Rx.
Result: A new patient folder has been synced from PrescribeIT® into PharmaClik Rx.
Note: Allergies and medical conditions can be added from PrescribeIT®, as required. To learn more, see PrescribeIT® Patient Compare Overview.